
Bad ski boots can ruin a great ski day before you even hit the snow. If you've ever had trouble getting your kid to put on their favorite pair of shoes — and be honest, we've all been there — you might already be feeling overwhelmed just thinking about ski boots.
Don't worry. I've got you covered.
After teaching my three kids and thousands of others how to ski, I've learned that most parents get their boot advice from rental shops or gear stores. That advice isn't bad — but it's different from what you'd hear from another parent who's also spent years teaching kids on the hill. That's what this is.
Here are four steps, plus a few honest notes, to help you dial in the boots and set your kid up for a great first day.
Why Ski Boots Matter
Let's quickly talk about why ski boots matter, because it's easy to underestimate them.
The skis do all the work on the snow. The boots are what connect your body to the skis, and therefore to the snow itself. If your boots are too loose, when you move your foot and leg, that movement won't transfer to the ski. Nothing changes on the snow. You could be doing everything right and it would still feel like nothing's working.
Think about trying to catch a baseball with a glove two sizes too big. It might feel comfortable trying it on your hand, but the moment someone hits a line drive at you, how confident are you that your fingers will move the glove fast enough to catch it?
On the other hand, if a boot is too small, it can be downright painful. Tight boots cut off circulation, make feet colder, and create discomfort before you even click into a ski.
The bottom line: if your kid doesn't want to wear ski boots, they're not going to want to ski. End of story. Let's dial it in!
Get the Size Right
Ski boots use a sizing system called Mondo (short for Mondopoint). It's simply the length of your foot measured in centimeters. A kid with a 20cm foot wears a Mondo 20. That's it.

The chart below covers the full range of kids' sizes from toddler through junior. Use it as your starting point, then measure your child's foot at home using the method below.
Place a piece of paper on a hard floor against a wall. Have your child stand on it with their heel touching the wall. Mark the end of their longest toe. Measure from the wall to the mark in centimeters. That number is their Mondo size.
| Mondo (cm) | US Shoe Size | Approx. Age | Notes |
|---|---|---|---|
| 15.0 | Toddler 6 | 2–3 yrs | Smallest common size |
| 15.5 | Toddler 7 | 2–3 yrs | |
| 16.0 | Toddler 8 | 3 yrs | |
| 16.5 | Toddler 8.5 | 3–4 yrs | |
| 17.0 | Toddler 9 | 3–4 yrs | |
| 17.5 | Toddler 10 | 4 yrs | |
| 18.0 | Toddler 11 | 4–5 yrs | |
| 18.5 | Toddler 11.5 | 4–5 yrs | |
| 19.0 | Kids 12 | 5 yrs | |
| 19.5 | Kids 12.5 | 5–6 yrs | |
| 20.0 | Kids 13 | 6 yrs | |
| 20.5 | Kids 1 | 6–7 yrs | Youth sizing begins |
| 21.0 | Kids 2 | 7 yrs | |
| 21.5 | Kids 3 | 7–8 yrs | |
| 22.0 | Kids 4 | 8 yrs | |
| 22.5 | Kids 4.5 | 8–9 yrs | |
| 23.0 | Kids 5 | 9 yrs | |
| 23.5 | Kids 5.5 | 9–10 yrs | |
| 24.0 | Kids 6 | 10 yrs | |
| 24.5 | Kids 6.5 | 10–11 yrs | |
| 25.0 | Kids 7 | 11–12 yrs | Bridges to adult sizing |
Whenever possible, try the boots on; both of them. Kids' feet can be slightly different sizes, and it's worth checking each foot individually.
If you're unsure or between sizes, pull out the liner and try it on without the shell. You'll get a much clearer picture of how the foot actually fits without guessing through the shell.
- Snug is safe.A snug fit keeps your child's body moving with the boot and the ski. When the foot has room to slide around inside the boot, control goes down and the risk of falls goes up.
- Wiggle room at the toes.A little room at the toes is okay. Honestly, what kid hasn't grown out of shoes? The bigger concern is side-to-side slop, not length.
- Comfort matters.If they're miserable in the shop, they'll be miserable on the hill. Don't talk yourself into a boot that doesn't feel right.
- Ski stance vs. walking stance.Your ski stance (knees moving forward directly over the toes) will naturally pull the toes and heel back slightly in the boot. A perfect fit with your toes touching the end of the liner can have more growing room than you might think at first.
What Goes in the Boot?
Obviously your foot goes in the boot. But what else?
I've seen all sorts of combinations over the years. Double socks, sweatpants tucked in, hand warmers stuffed into the toe box. Here's the honest answer: one long sock, pulled up smooth, and nothing else.
Even small wrinkles in a sock can feel like a sharp rock once the boot is buckled and pressure is applied. Pull the sock all the way up, smooth it out from the toes up, and then put the boot on. This one habit eliminates a surprising number of "my feet hurt" complaints!
Keep everything else out of the boot. Sweatpants cuffs, base layer bottoms, extra padding; all of it stays outside. Most snowpants have an elastic cuff designed to go around the outside of the boot to keep snow out. Use it.
Ski boots are already well-insulated, so you don't need a thick sock. This is actually a great time to invest in a quality merino wool ski sock.
Recommended brands:
You don't need to spend a fortune, but a $20 pair of ski socks is one of the most cost-effective upgrades you can make for a kid's ski day. They work great for sledding, snow forts, and walking the dog too!
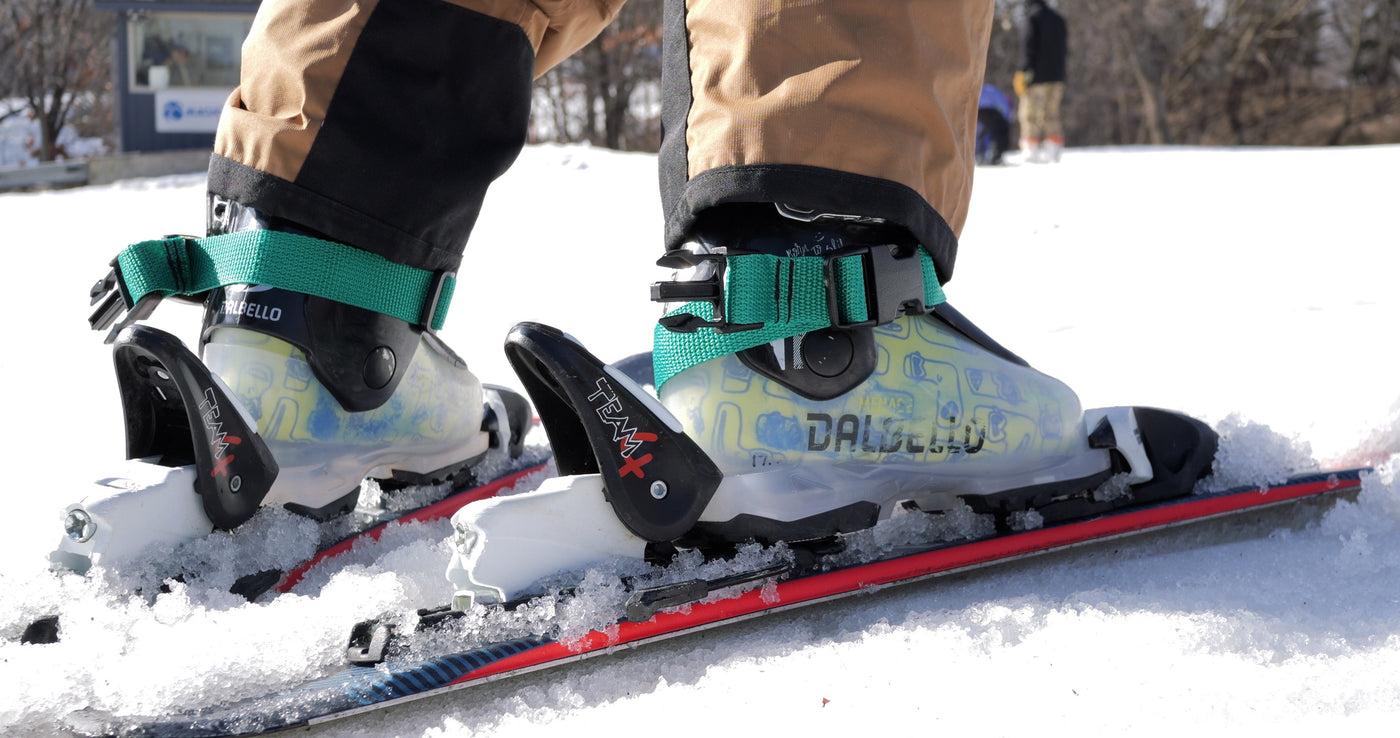
Buckling Basics

The goal is a snug, secure hug. Not something that feels like it's biting or pinching.
Here's how I actually do it, and how I'd walk a parent through it on the hill:
Get that sock pulled up nice and smooth first. Get the boot on straight; tongue centered, liner sitting flat. Then squeeze the boot with your hands into place and then buckle it to keep it there. This is the starting point and you can make it one or a couple clicks tighter than this and you should be in great shape!
Once it's on, I always ask the kid the same thing: "How does that feel? Anything in there feel like it's biting you?" And then, just to make sure: "Good — we gotta check for polar bears. They love to sneak into ski boots."
Works every time.
A loose boot isn't just a control problem, sometimes it's a safety problem. Snug is safe; extra movement inside the boot can cause other issues and injuries we want to avoid. And most importantly we need to keep those magic marshmallows protected from the snow snakes, and they can't do their job in a sloppy boot.
The boot should feel secure without any sharp pressure points. If your kid says it's too tight, ask them if something's biting or if it's just "too tight." There is definitely a difference; any parent who has heard "my car seat is too tight!!" before they even had a chance to finish buckling it knows what I'm talking about. Sometimes a fold in the liner or sock feels like a shark eating you, that's an easy fix. Sometimes everything's right and it's still just "too tight" — in that instance try this: just flip the buckle open, have the kid stand up, bounce or wiggle their toes and buckle it right back down. 9 out of 10 times something as simple as validating the feeling by physically unbuckling and rebuckling the same buckle can prevent a meltdown and keep you on the same team!
Give it a few minutes. Boots settle as the liner compresses and a recheck after 5-10 minutes of walking around is never a bad idea.
Test It Out

Before you head outside, the best thing you can do is get them moving and help them forget they're wearing boots at all.
Now you've got the boot on, but can you dance? Can you walk to the door? Can you bounce? The sooner they forget they're wearing them and just play again, the better. That's your green light.
What you're also doing here is sneaking in the first ski movement without calling it that. When you ask them to push their knees forward toward their toes and feel their ankles engage, that's the foundation of how they'll move on snow.
- "Too tight!" doesn't always mean much on its own.Something "pinching or biting" in a specific spot is worth investigating.
- One foot complaint but not the other.Check that foot individually. It's okay to buckle one boot a little looser than the other; they don't have to match perfectly.
- Boot falls off?Too loose. Start over from the top.
A Note on Flex Ratings
You might see a number on the ski boot box, something like "Flex 50" or "Flex 70." This is supposed to tell you how stiff the boot is. Here's the honest truth: it's complicated, even for adult boots.
No flex rating is consistent across brands. A Fischer 90 flex is softer than a Fischer 130 flex; that comparison makes sense within the same brand. But you could find a Lange 110, a Fischer 120, and a Dalbello 130 that all feel remarkably similar once you put them on.
For kids, most traditional-looking boots will actually be too stiff to truly flex the way a small beginner needs. Fit is honestly more important than the number on the box.
Fischer recently released the Fischer One and Fischer Two boots, with a much softer upper cuff and a zipper enclosure instead of traditional buckles. These work great for young beginners.
There's also a cult-like following for the Nordica "Nordy" - which parents and instructors who know it love for the littlest kids. If you find one that fits, grab it.
If either of those sound like the right fit, great. But remember: the most important thing is that your kid wants to wear them and go skiing. We can figure everything else out along the way.
Pro Tips
Squish the Magic Marshmallows
This is my favorite trick, and I use it with kids of every age.
Place an imaginary marshmallow between your kid's shin and the tongue of the boot, then have them squish it by pushing their knee forward. This simple cue helps them find a balanced, athletic position and gets their body moving forward over their toes, which is exactly where it needs to be for skiing.
Play around with it. Some kids love "squish the marshmallow." Some respond better to "smashing grapes" or "crushing spiders." The cue matters less than the movement it creates.
Used Boots
A true parent hack: if your kid has wider feet or some sensory sensitivity with shoes, try a used pair of boots. Already broken-in boots have more volume and a more forgiving feel without needing to size up. Check buckles, inspect for cracks in the shell, and make sure the liner hasn't compressed to nothing. A good used boot can be a great solution!
Never Put on Cold Boots
If you've ever left your boots in the car overnight, you know how miserable it can be. When boots get cold, the plastic hardens and they are a nightmare to put on, much stiffer to buckle, and a lot less comfortable. Bring them inside the night before, or at minimum warm them up before putting them on. Works great for parents too.
Recap
- Get the right size; snug, not painful
- Measure in centimeters first, then cross-reference the chart
- One longer merino sock, pulled up smooth, nothing else
- Buckle snug from the bottom up; a hug, not a pinch — no polar bears
- Walk, dance, bounce inside before heading out
- Flex ratings are inconsistent; trust fit over the number on the box
What's Next?
Once the boots are dialed in, the real fun starts; getting your kid moving in them.
The next step is learning how to actually move in ski boots before you ever touch snow. Boot work at home is one of the highest-leverage things you can do to set your kid up for a great first run, and it requires zero snow, zero hill, and about 10 minutes of space in your living room.
Read: Boot Work at Home — and Why It Changes Everything →